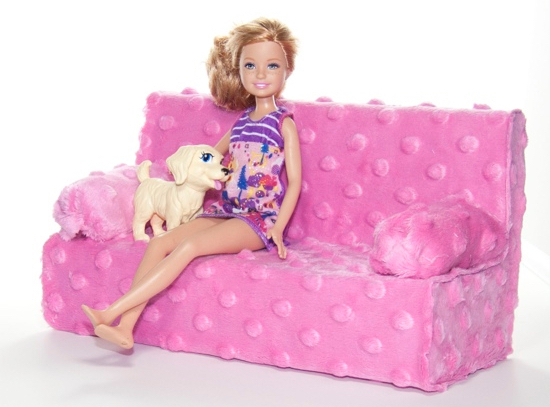
Because of the quality in the design and fabulous fabric of this couch, Barbie thinks this beautiful furniture came from a fancy department store, but it was really made out of an old tissue box and pink receiving blanket (Shhhh). If you would like to upgrade your Barbie’s couch from drab to dreamy, just follow these easy steps below. Have fun!

Materials Needed
- empty rectangular tissue box
- a ruler
- permanent marker
- scissors
- masking tape
- fabric glue
- 2 Rubber Bands
- 8 Cotton balls
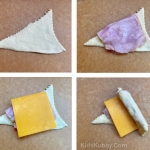
- thick fabric (anything furry or fuzzy is best)
Instructions
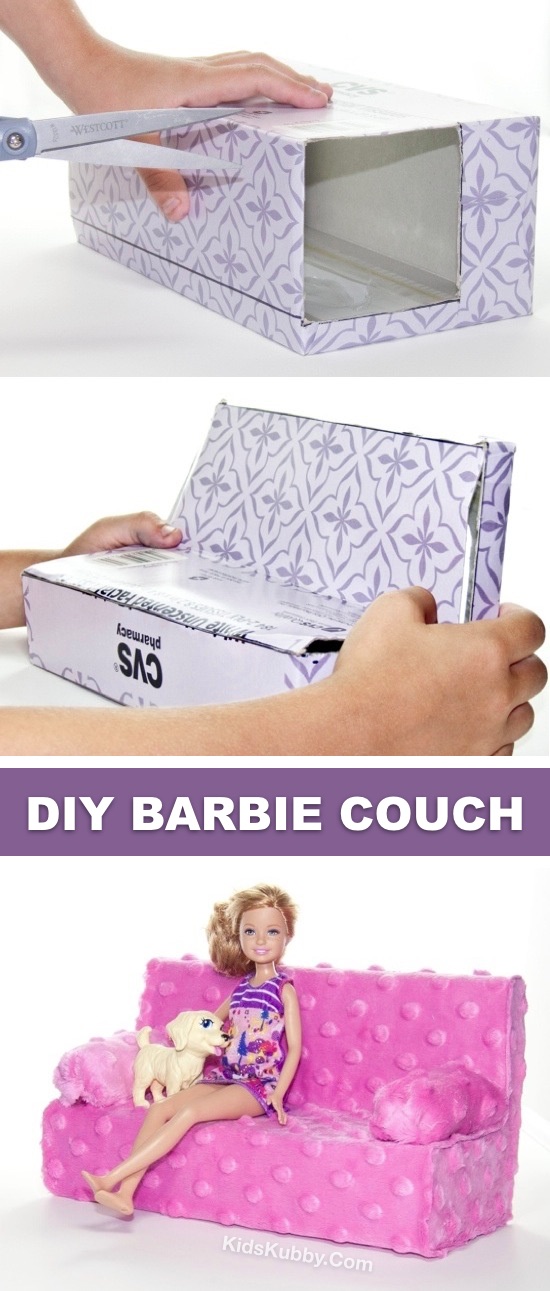
STEP 1: Use your ruler and pen to measure two matching 3-inch squares on the corners of both small ends of the box. Next, draw lines across the long sides of the box like shown below (these will work as a guide later when folding the box).

STEP 2: Cut out the 3-inch squares that you outlined on both ends of the box.

STEP 3: In order to create the couch shape, push in the edge of the box as show below.

STEP 4: Use masking tape to secure the open seams.

STEP 5: Hold the L shaped side of the box on top of the back of your fabric and cut the fabric to fit, leaving plenty of room to trim to size later. Use fabric glue to secure the oversized pieces on both ends and then trim the fabric to fit the sides.

STEP 6: One section at a time, glue a 9 x 19 inch piece of your fabric to the rest of your tissue box, starting at the bottom so that your seam is hidden. If it’s too long, simply trim to size.

STEP 7: Don’t forget about the couch arms! There’s no sewing required. Cut out two 4 x 6 inch pieces of fabric and roll them into 6 inch long tubes (with the good side of the fabric on the inside). Secure one end with a rubber band and then turn it inside out as shown below.
Fill the fabric tubes with 4 cotton balls and trim off any excess material if needed. Use the fabric glue to hold the seams together. Glue the arm rests down onto the side of the couch with the seam sides down.

Voila! Now your Barbies can sit in style. That’s all she needs now is a flat screen TV, iPhone 15, cozy throw blanket, and a lent roller for her dog. I hope she doesn’t spend too much time binge watching Netflix!

Don’t forget to pin and save this easy DIY Barbie couch for later!
![]()