I’m in love with these paper ballerina snowflakes! Maybe it’s because I have a girl who would adore these hanging in her bedroom. It’s also the perfect time of year for these snowflake ballerinas to hang from the Christmas tree.

These DIY ballerina snowflakes are a lot easier than they look. After printing out the ballerina templates and following the snowflake tutorial below, all you will need are a pair of scissors, paper, and thread for hanging. Although all of these snowflake ballerinas are shown in white, I don’t see why you couldn’t vary them up a bit with a few different colors; perhaps colors that match the room’s decor.


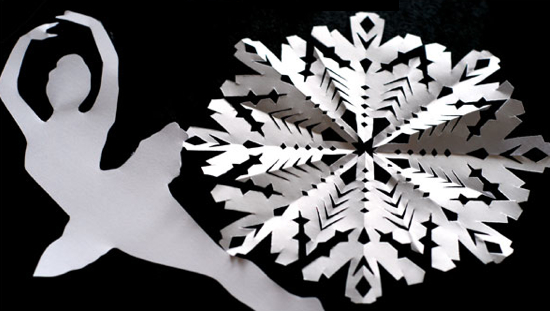
Click here for an easy snowflake tutorial photo to help you with your snowflake designs. Once your snowflakes are done, cut a slit in the middle and carefully weave your ballerina through. You might have to bend her arms a bit. If your slit turns out to be too big, put a little tape on the bottom to hold it together.

Krokotak has very detailed instructions for these ballerina snowflakes! I recommend you go check it out. Here are some printable snowflake ballerina templates from Krokotak to get you started. Click on each one for a larger printable PDF. You might want to use thicker paper for your ballerina silhouettes to help prevent tears and also make them last longer and hang better. Use a needle and white thread to hang them. You could also tie the thread (or thin fishing wire) around one of the ballerina’s wrists.


![]()